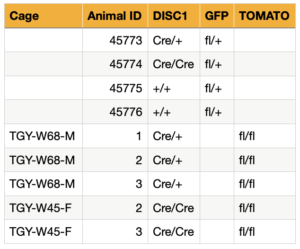
The template file consists of a header with a cage column, an animal ID column, and several genes columns.
Each row represents a unique animal.
2. Fill in the information
The cage column is optional, however, if animal IDs are not unique within your colony, you should add the cage to help identify the animals correctly.
Place the genes as column headers (e.g., DISC1, GFP, TOMATO). And alleles within each corresponding cell. Empty cells are ignored.
For example:
Animal 45773 has genotype DISC1(Cre/+) – GFP(fl/+)
Animal 3 from cage TGY-W45-F has genotype DISC1(Cre/Cre) – TOMATO(fl/fl)
Then save the file as Comma Separated Values (.csv).
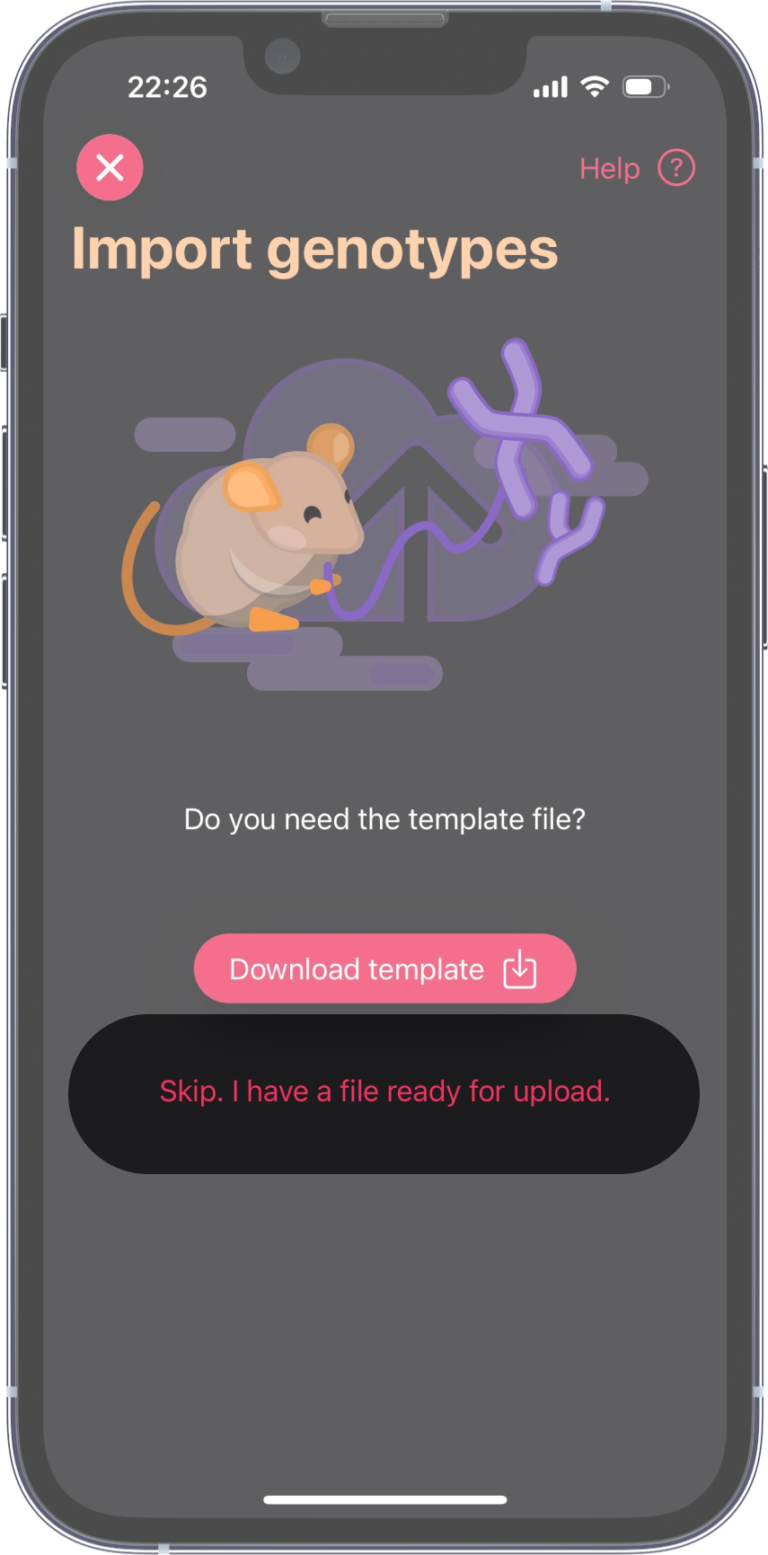
3. Settings
With your file now ready, go to your Settings‘ page, select the Uploads row, then choose Genotypes.
Click on the Skip. I have a file ready for upload.
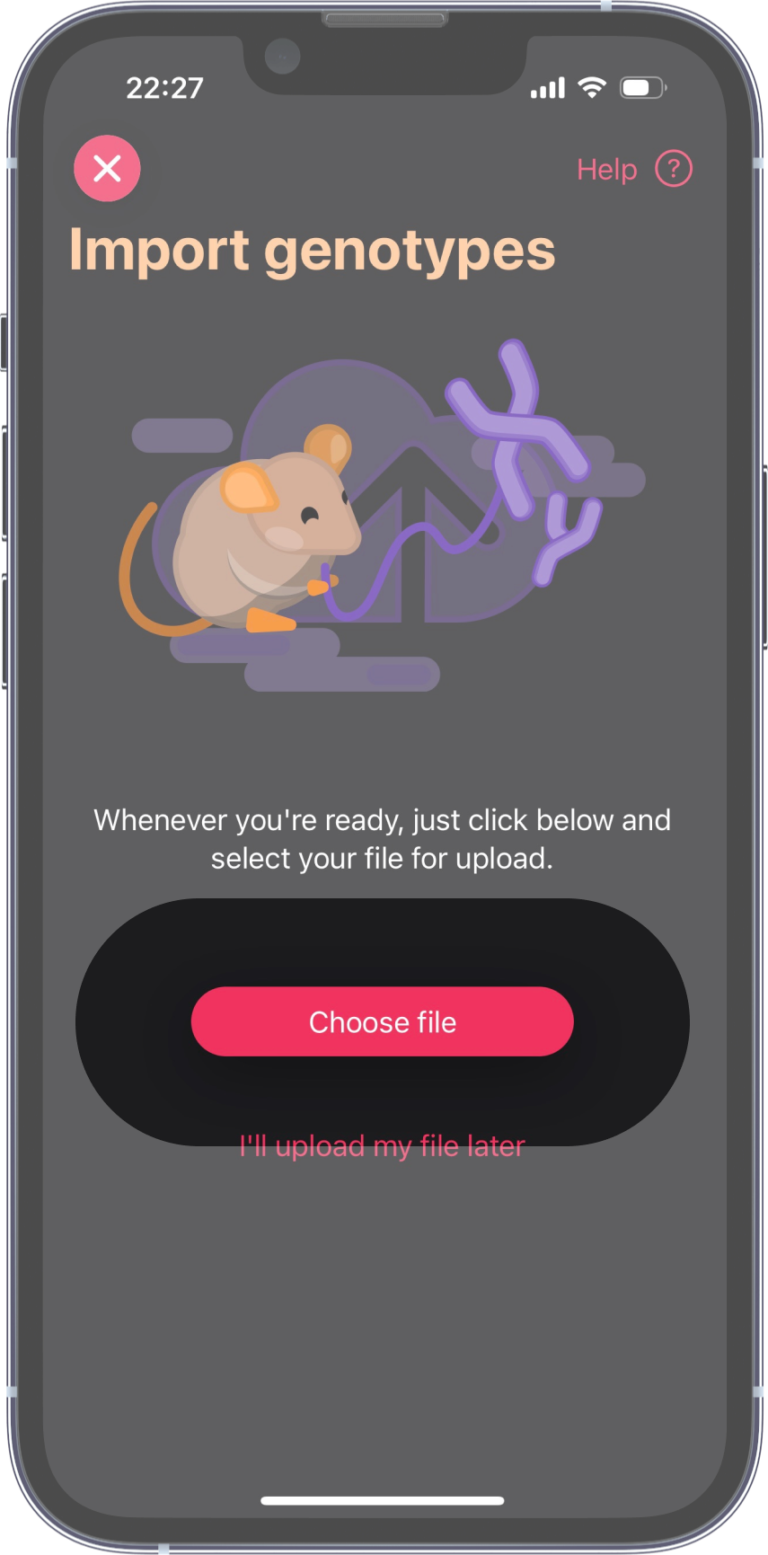
4. Choose file
Click on the Choose file button.
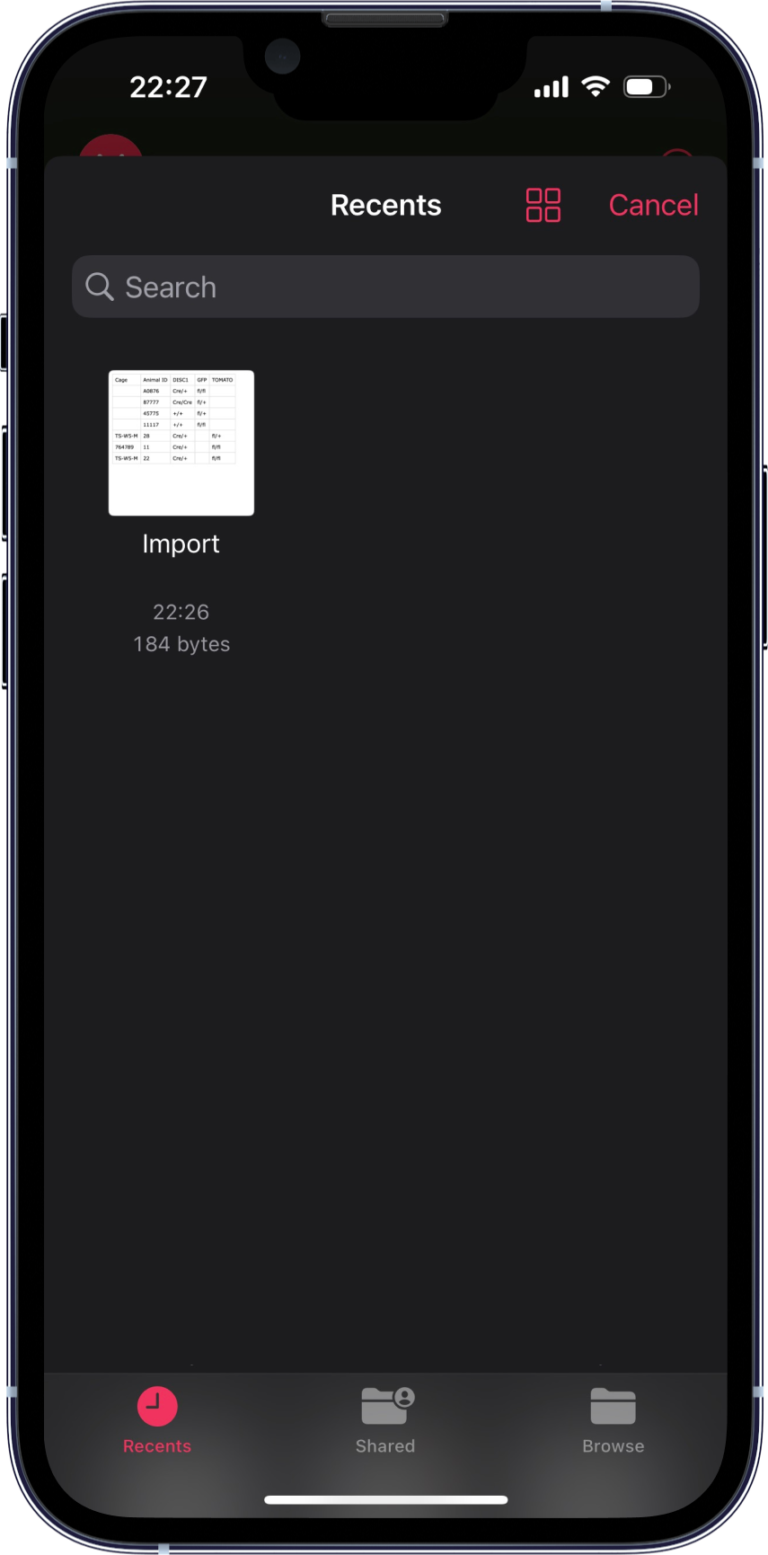
5. Select the file
Travel through your directory and select the body weight .csv file.
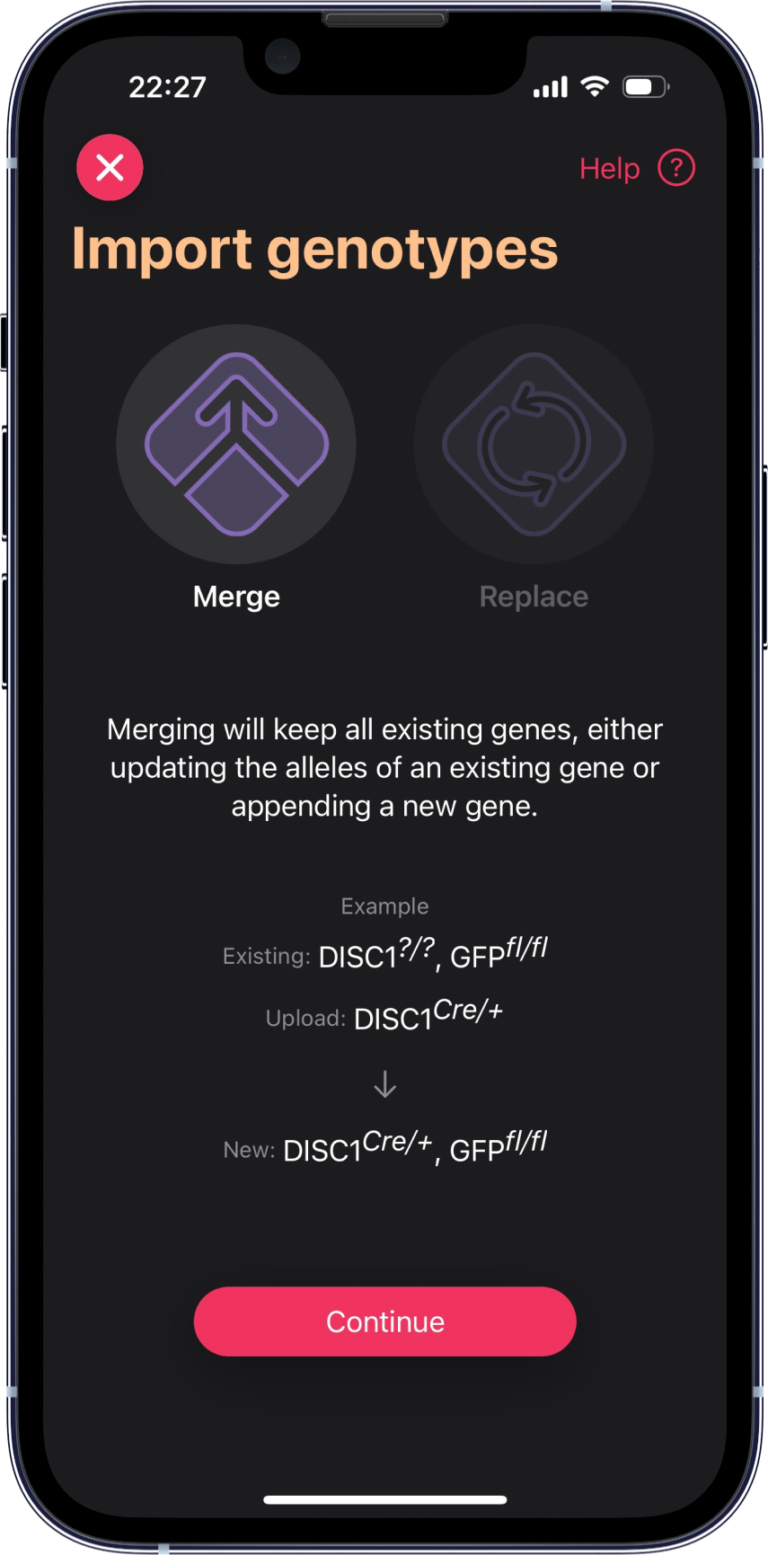
6. Merge vs Replace
Select whether you’d like to replace an existing genotype, or merge the old and new genotype together.
Follow the description and example to see which fits best for you.
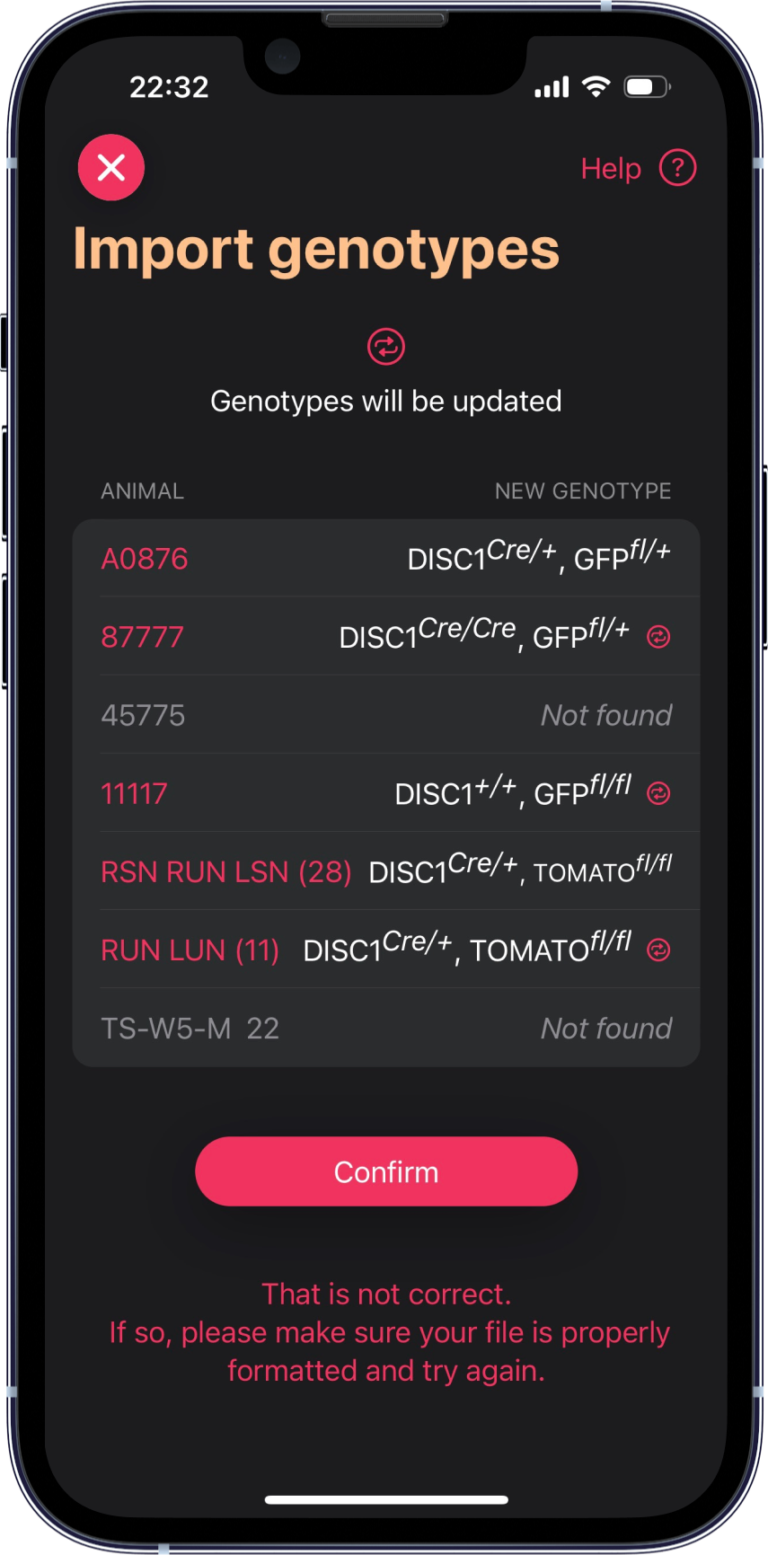
7. Confirm
Before the genotypes upload, confirmation will be required.
The first few animals of your file will be presented. If animals were found, they will be highlighted in pink, you can click on them to pop-up their detail page. If the animals could not be identified, they will appear in grey.
Make sure everything looks correct. A double arrow symbol is presented when a genotype already exists for this animal.
If all looks good. Click Confirm and your upload will be done!